DIY Farmhouse Table

Okay, I didn't want to call this post "Farmhouse Table" because...well, it's annoying, isn't it? As I type this, I know farmhouse is over among the hep set—a quadrillion Pinterest boards do not lie. When Walmart has a farmhouse collection, the writing is on the wall, right? Maybe. BUT I love my big rugged table. I've wanted one forever even though I didn't know it. For years I was obsessed with midcentury modern decor. I longed for clean clever lines in my life—something to counteract the general shabbiness of my busy, messy life.
My lovely golden ash Krug dining room set was gorgeous. A stylish pain in the ass. The table had to be covered to protect it from...well, us. The chairs, while comfortable enough, weren't designed for the impatient bottom of a toddler. The crisp little hutch couldn't tolerate the force of my curiosities, mementos and milk glass. It was becoming pretty evident that we were more Clampett than Draper.
The set deserved better. I sold it for a fraction of what it was worth, but for $50 more than I paid for it from the original owner. Great. No more worrying about water rings or spilling on the super cool, CREAM-COLOURED upholstery. No more fussing. Also, nowhere to eat our meals. I hadn't found the right (affordable) replacement yet. Nothing was quite right. We wanted a big, comfortable table with history. Turns out, so does everyone else. Big old tables last nanoseconds on the online classified sites here. Craftspeople will make you a "harvest table" complete with faux life scars for upwards of $700. I couldn't justify (read: afford) that kind of money for a table we wanted to gently ruin over several decades.
And so we continued to eat around our beat up old Ikea Jokkmokk, relieved from mountains of unfolded laundry and brought up from the basement. My husband thought it was great—low profile and free. He wasn't wrong, except for the great bit. Sure it was low-maintenance, but it was also tiny, unsubstantial and not suitable for entertaining. The Jokkmokk is not intended for such pursuits. It's for dorm rooms and first apartments. But I still had an affection for it, hence its relocation to the basement rather than the curbside. It was time for Pinterest. A quick search revealed many people handier than myself had transformed their Jokkmokk's into farmhouse tables. But after several hours of scrolling and pinning, I couldn't see the distressed table top for the chalk paint legs. I felt a little disheartened. I didn't want a cookie-cutter faux farmhouse table. I wanted a big-ass rugged table that bonafide farmhands would feel comfortable at. And so armed with just enough knowledge to be optimistic, I decided to do my own thing. And this is it. If you're still reading, I'm finally getting to the point.
Materials Needed:
Ikea Jokkmokk table or other small sturdy table with legs or base you like
Three 2"x12"x6' boards - any cheap wood you like. We purchased two 12 foot dimensional spruce boards and had them cut them in half.
One 1"x3"x6' board
drill and 2 1/4 inch screws
Belt sander or sandpaper and time
Wood glue
Epoxy to fill knots and holes in wood (if necessary)
3 F-clamps or vises that can handle at least 3 feet width
Black tea bags (for stain) or readymade stain of your choice
Paint brushes
Varnish or wax for finishing
Method:
Wood
Choose your wood. We opted for spruce. If we had any spare wood lying around we would have used that. We chose two 2" thick /12" wide boards from the dimensional lumber section at our local lumberyard. You can totally use 1 inch boards, but I wanted a really rugged, slab-like look. Look for boards without huge cracks or super deep knots or holes. Some imperfection looks great, but too much and you could wind up with a compromised table top. The boards chose were 12 feet long and as we wanted our table to be 6 feet wide, it worked out great. We asked to have 2 boards cut in half, leaving us one extra board for inevitable screw-ups.
Sand big or go home.
Depending on what kind of boards you chose, you may or may not have a big sanding job ahead of you. Spruce is soft and one of the boards I chose was pretty banged up. This was intentional on my part, though my husband thought that I had SURELY been duped. And so I sanded and I sanded. And I learned a bit about sanding. Like, how my little finishing mouse is not meant for big, slivery slabs of wood. And that there's an actual reason why you may want to use a different grade of sandpaper at different times in the process. I'm not handy, but I'm enthusiastic. After a couple hours of hand sanding I borrowed a belt sander. It was a bittersweet moment. In minutes, I accomplished what hours of sweaty physical labour could not. I felt like a bit of a sell out, but man, did I like how quickly I was able to round the edges of the square cut boards. Once the the boards were sliver-free and rounded, it was time to stain them.
Tea stained

Three 2"x12"x6' boards + a 1"x3"x8' board. The wide boards were fairly close in colour to the 1"x3" before the tea stain
I wasted a lot of time fretting about stains. Pinterest says Minwax Dark Walnut stain. Like, everywhere. And it's a nice stain. I'll probably use it on some shelves or something at some point in my life. But I was feeling obstinate. And, like I said, almost every table makeover I came across was a dark walnut with white chalk paint. I started researching natural stains and of course, tea came up right away. Loads of people are and have used tea to stain wood. I was sold. If it didn't work, I'd only be out that weird box of ancient black tea from the back of my cupboard. I boiled 4 cups of water and added 12 black tea bags. I allowed the tea to boil down and reduce by a cup and left the tea bags in the water overnight. I applied 3 coats of tea stain to the sanded tabletop, letting it to dry completely between coats. This was actually my favourite part of the project. The tea smelled wonderful and I truly enjoyed the smug superiority of being so old-timey and environmentally awesome. I also loved the warm glow it gave the wood. It was summer when we did this and warm, so dry time was really quick. Once the boards were totally dry, I roughed up the surface a bit to make the finish a little more interesting. It was now time for me to do the terrible thing.

Scuffing it up a bit for a less uniform looking finish
The terrible thing
Right, so I was really quite pleased with my tea stain, but I felt the grain needed a little more depth. Without thinking it through AT ALL, I ran into the house to grab some dark walnut (the irony is not lost on me) Restor-A-Finish I had inherited at some point. I began rubbing the oily substance into the wood and boy, did it take. The wood positively sucked up that walnut colour and after wiping it off again, it looked rather smart. Three quarters of the way through, I began to wonder about Restor-A-Finish. I mean, what was it anyway and could it possibly have an impact of how I decided to finish the table. Turns out it had a huge impact. It's super secret formula is basically mineral oil, a bit of alcohol and pigment. So what? Well, that means I definitely couldn't use the water-based varnish I was considering and possibly couldn't even use oil-based varnish over the mineral oil.

See, it looks nice with that Restor-A-Finish, doesn't it? Terrible and not terrible.
The internet was divided. My dad suggested I apply a coat of shellac and then just go ahead with my varnish of choice. However, an entire forum of woodworkers seemed to passionately disagree. After frantically researching, I finally found someone somewhere who suggested a good sand down, followed by cleaning the wood with alcohol and then following up with an oil-based varnish. And once we attached the boards together, that is what I did.
Why not just wax it?
Gah, I don't even want to talk about it. But I will. Really briefly. So, I could htave waxed over the Restor-A-Finish. I agonized over this. Originally, I had intended to go full traditional and wax the wood. BUT every practical person in my life tried to talk me out of it. Finally, my dad pushed me firmly over to the varnish side with a tale of sticky elbows and melty casserole rings—things I didn't want in my life. Varnish won and it's turned out great so far. I chose a satin finish as it was the closest to the matte wax finish I like.
Getting it together—wood glue, screws & vises
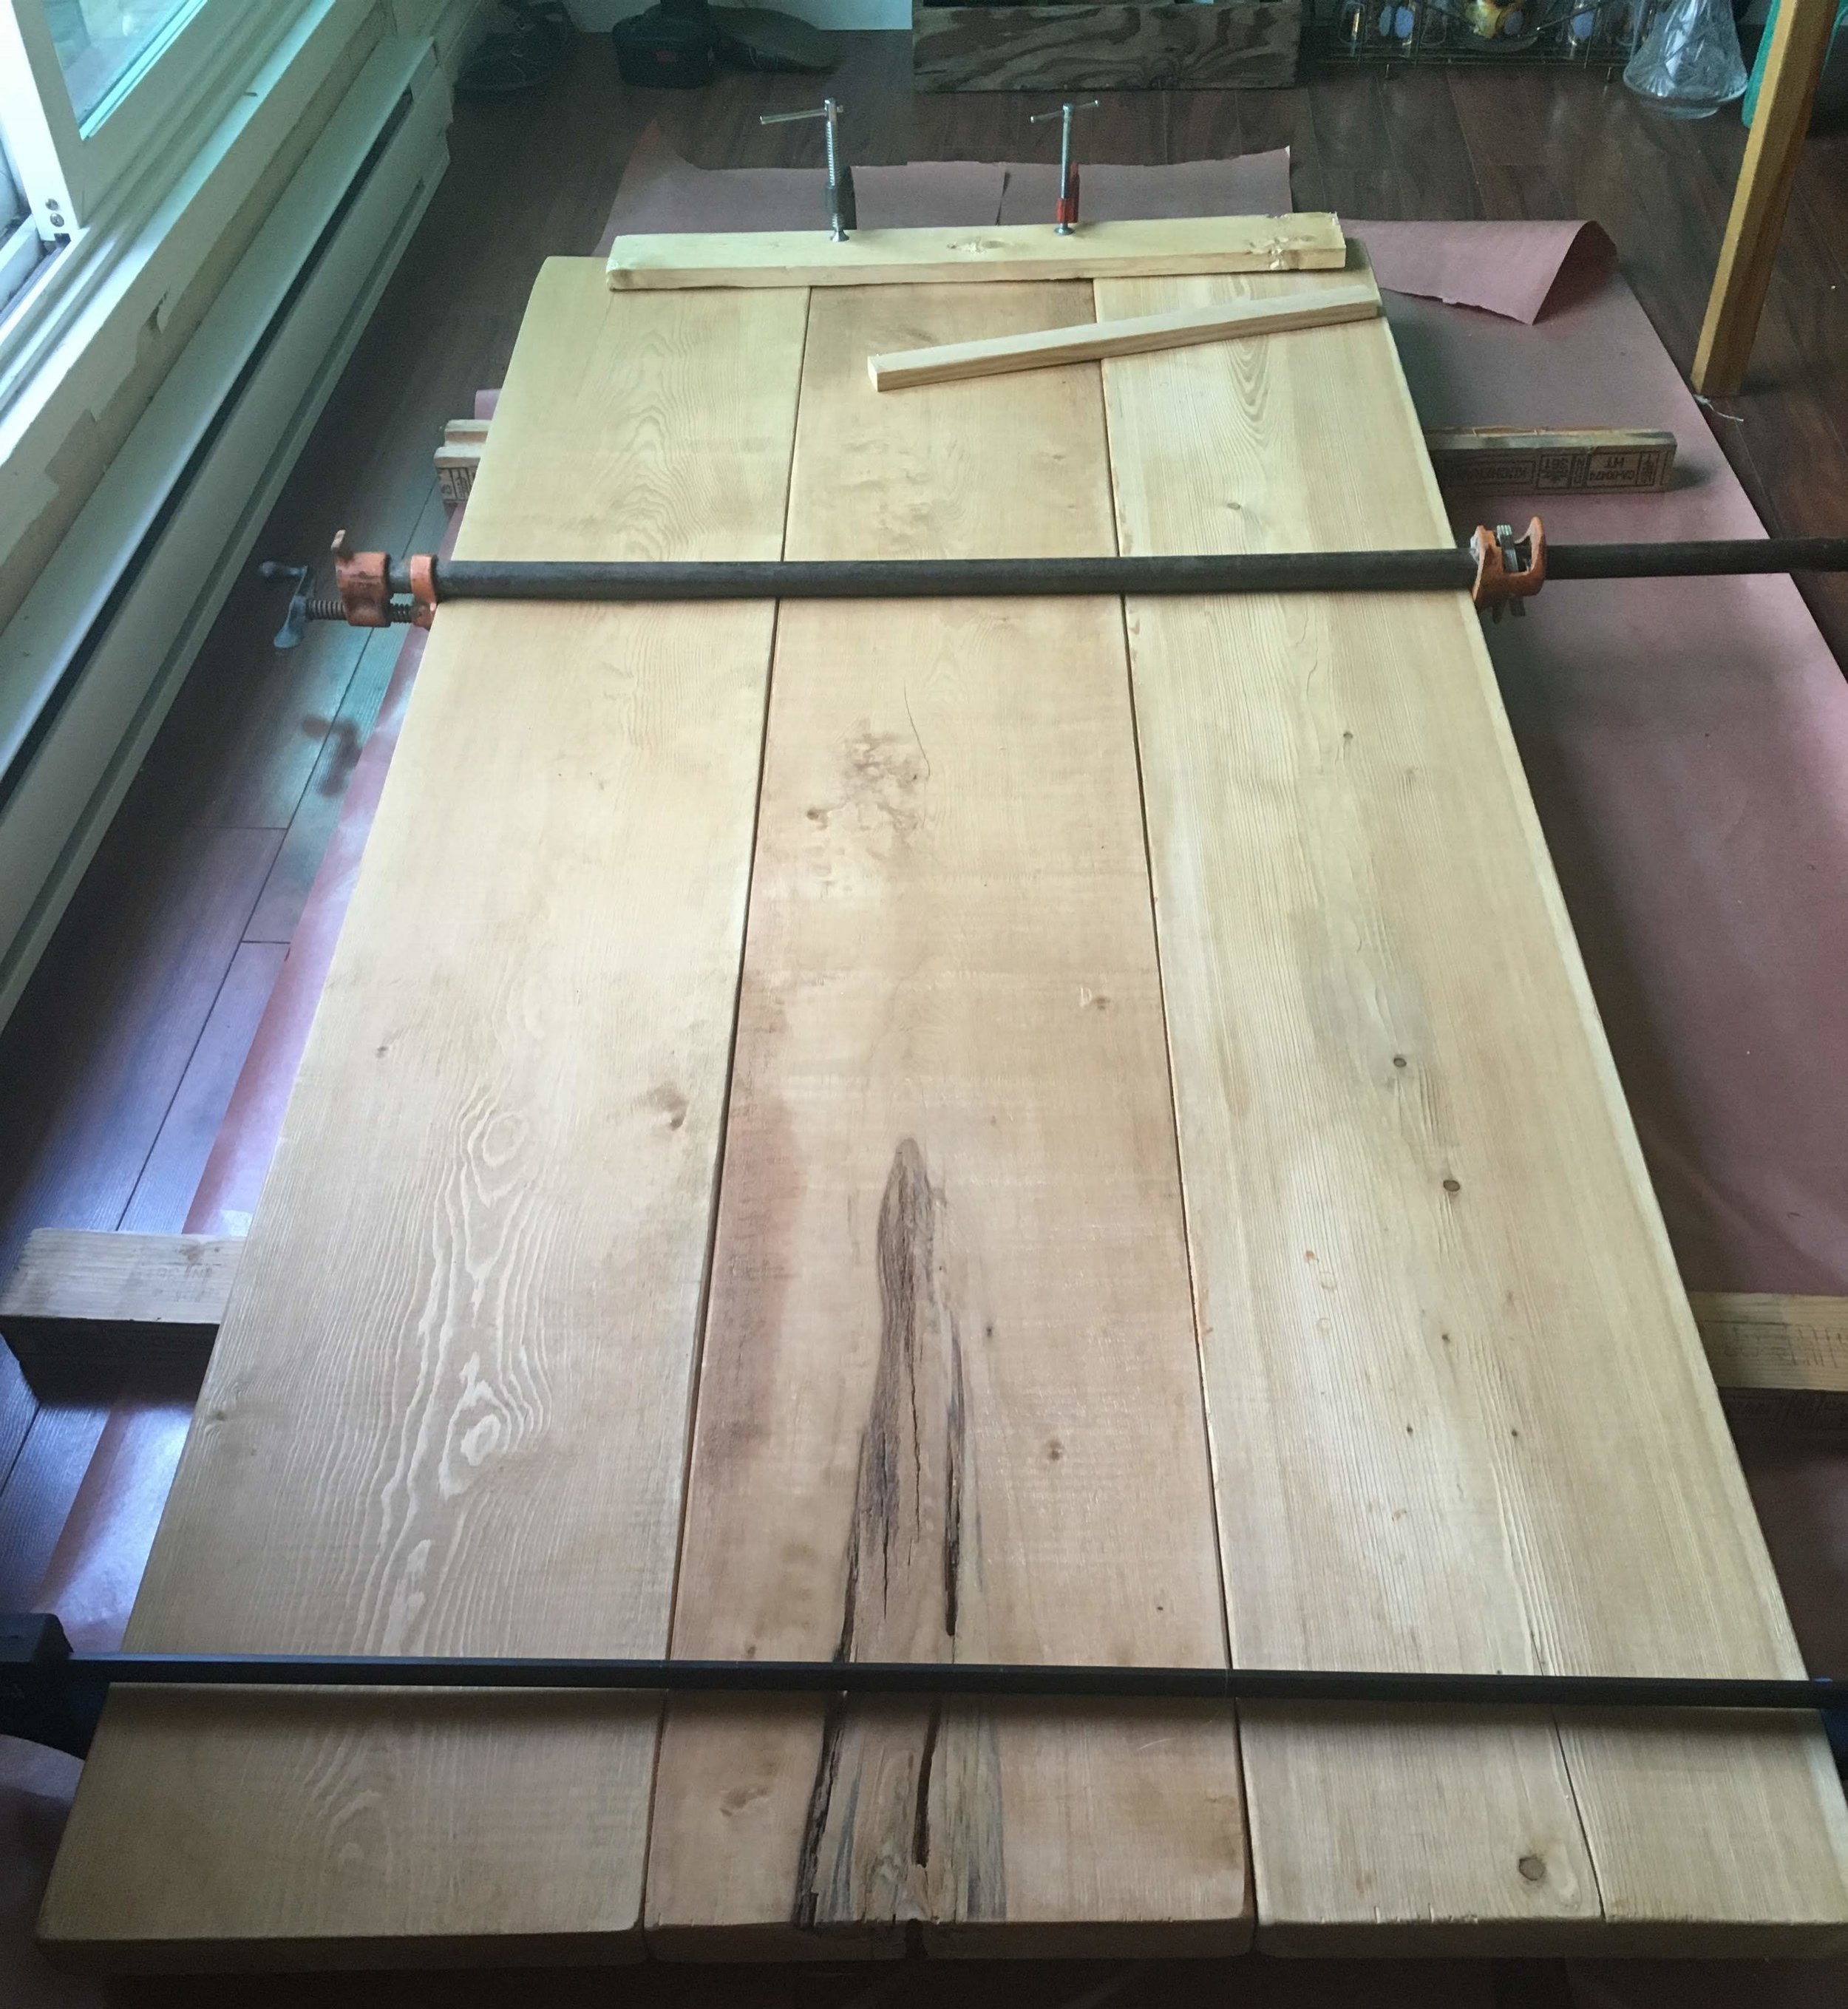
This was pretty simple, but definitely requires two people. We just laid out our boards in the configuration we wanted and then flipped them over for the gluing and reinforcing. We stuck them together with a combo of wood and carpenter's glue. They may be the same thing, but we had two bottles labeled with different names, so we used a bit of both. We made a half-assed attempt to wipe up any excess glue, but I wasn't too concerned because I could sand off any mistakes (natural distressing!) before I sealed the wood. Once the boards were glued together, we used three F-clamps to squeeze them together. You'll see in the above photo that we also used smaller clamps and piece of 1"x3" on one of the ends. This was to minimize some cupping we had with one of the boards. I was completely content with a bit of a wonky board, but my husband wanted to have a go at straightening it up a bit. And he was moderately successful. The middle board was still slightly uneven compared to the others, so we both won. And winning matters. The next morning we screwed 1"x3" boards cut to the width of the table and fastened them horizontally near both ends to brace the boards and hold the table together. If you're not trying to force wood into straight lines, you could do this right after you glue and clamp.
Filling in the holes, trenches, and other lovely imperfections
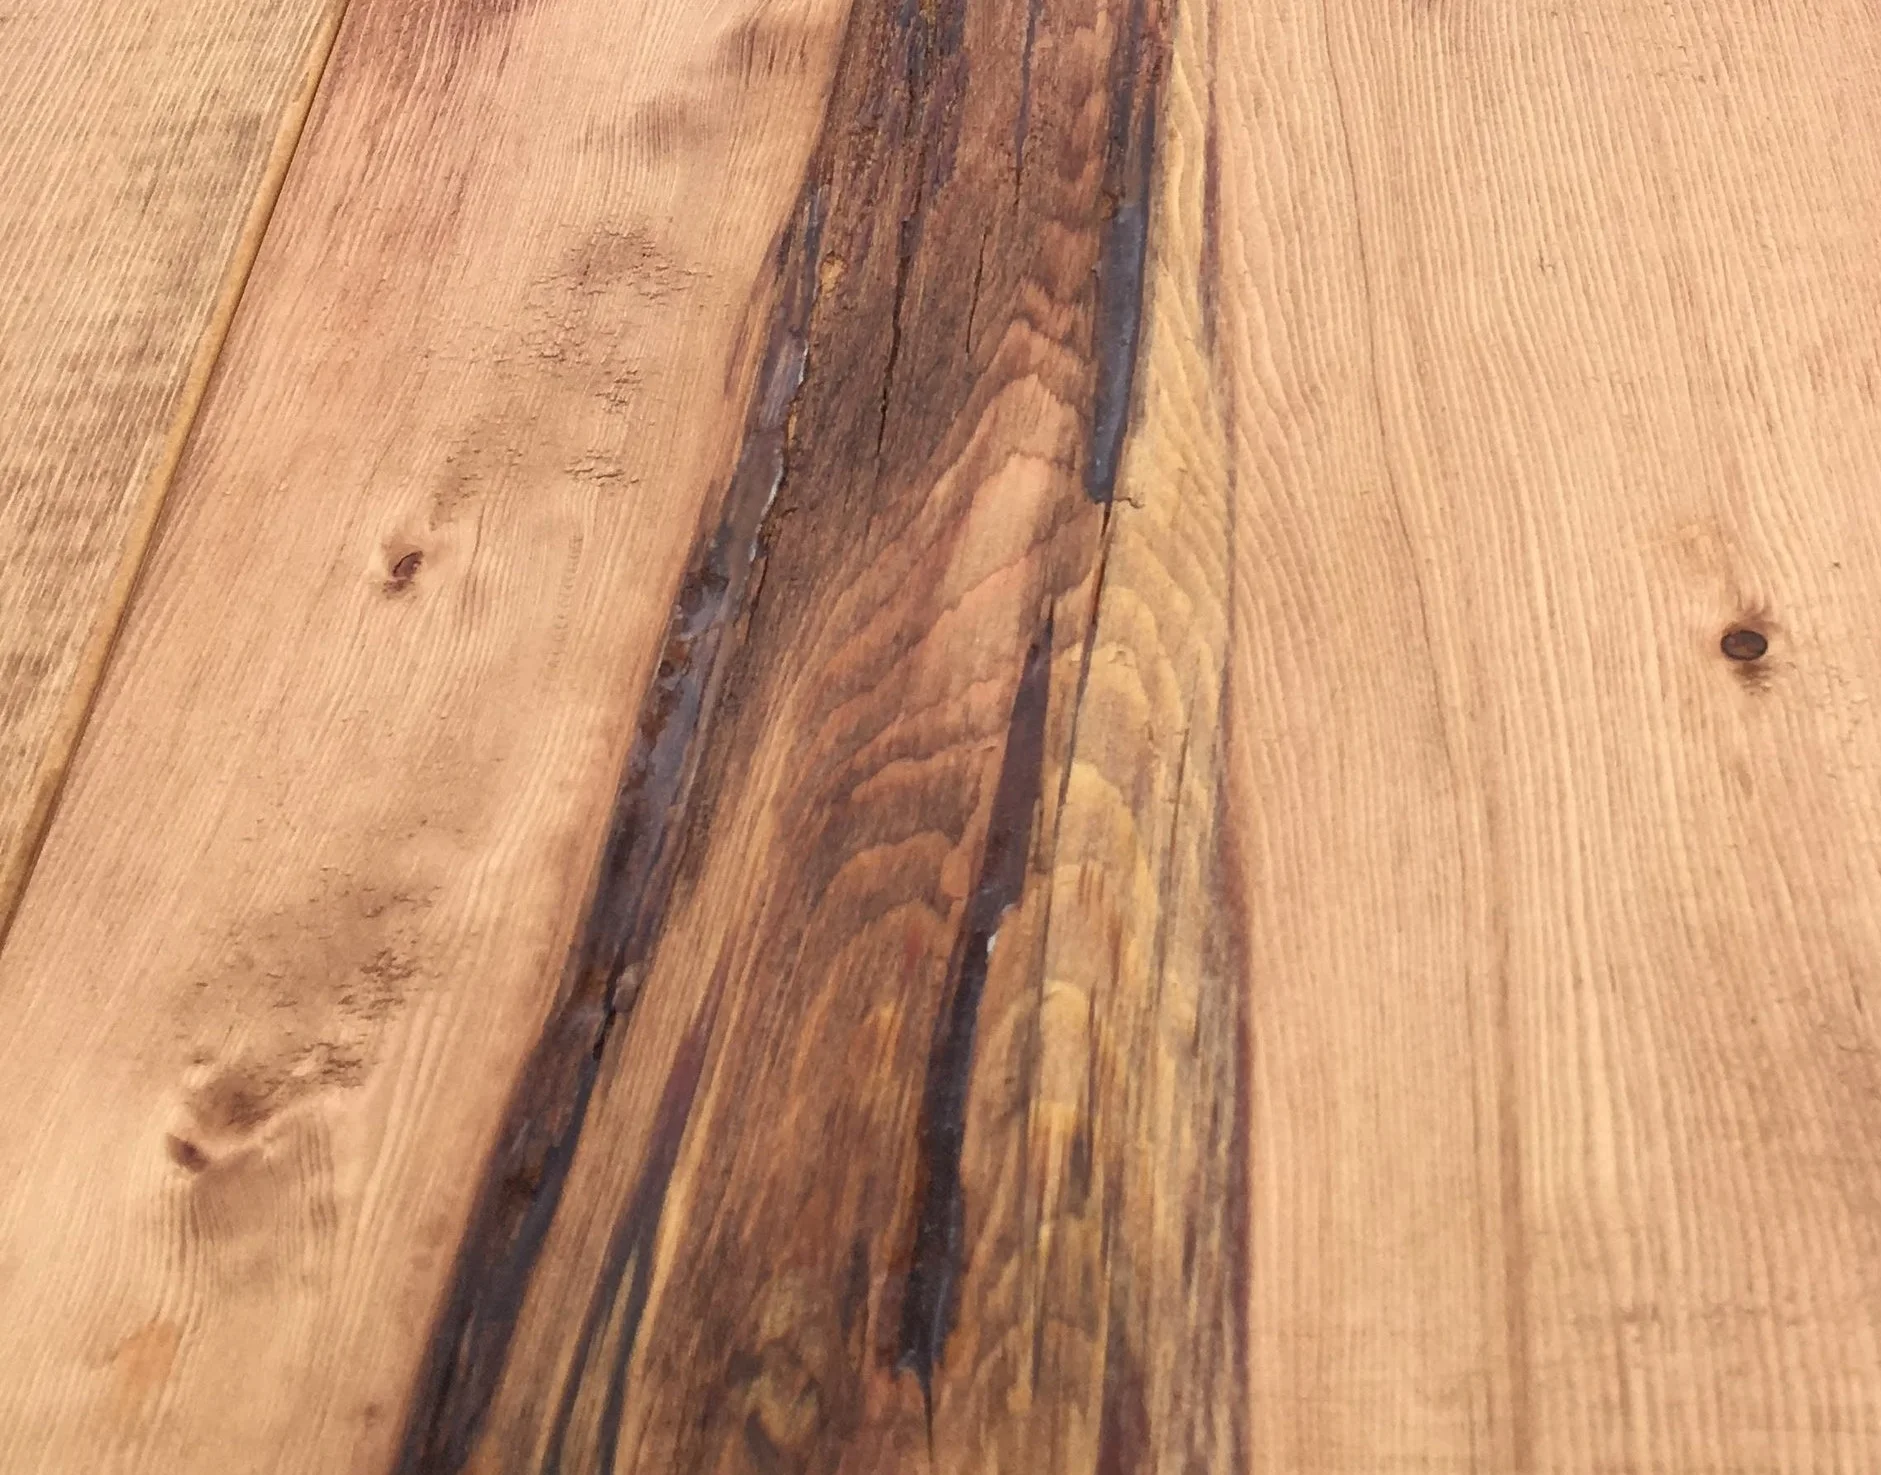
Not the tidiest job, but I was pleased. Once the varnish was applied, this looked pretty flawless.
I intentionally chose a board with visible knots, resin and a couple of deep fissures. It gave the wood a lot of character, but was going to make cleaning it a pain in the ass. So, I bought a small bottle of Gorilla Glue epoxy and filled in the holes and cracks. I taped off the surrounding area and worked carefully, knowing that I could just sand off any escaped epoxy. This worked a treat. The epoxy dried crystal clear. I roughed it up a bit with fine grade steel wool to tone down the gloss and I'm really pleased with how it looks.
Seal the wood

If you stained your table with something water-soluable, you can apply a water-based varnish. If you slathered your table in mineral oil, your options are to go directly to wax or do what I did a few paragraphs ago (sand + alcohol + oil-based varnish). Despite the big panic, I'm really quite pleased with the finish I wound up with. Very low sheen and so far, really quite durable. I wiped the table with a tack cloth and applied three coats of satin oil-based varnish with foam disposable brushes—allowing the coats to dry completely and very lightly sanding in between.
Attach the table top
Okay, so full disclosure - we haven't actually done this yet. The table top is very heavy and sturdy, but we will screw it into the old table just in case our 8-year-old decides to stand on it or something. Our plan is to drill from underneath so as not to mar the tabletop and I'll update this post once we've done it. My dad's offered to build real legs for the table when he next visits. Although it's fine the way it is with the smaller pine table underneath, we're going to take him up on his offer. Legs closer near the ends of the table will make seating just a little more comfortable.